
How to fill lip gloss squeeze tubes
To fill lip gloss squeeze tubes, start by preparing your workspace. Use clean tools and carefully seal each lip gloss squeeze tube to ensure safety. Maintaining cleanliness is crucial for every batch of lip gloss squeeze tubes you make, helping prevent germs and keeping your gloss protected. Use a syringe, pipette, or squeeze bottle to fill your lip gloss squeeze tubes efficiently. Many people who create gloss at home or for business enjoy this process with lip gloss squeeze tubes because it’s simple and fun. Rely on Xinfly Packaging for high-quality lip gloss squeeze tubes that keep your gloss fresh.
Key Takeaways
- Always clean your lip gloss tubes before you use them. This helps stop germs and keeps your product safe.
- Use tools like syringes, pipettes, or squeeze bottles. These help you fill the tubes easily and correctly.
- Measure your ingredients carefully. This helps your lip gloss have the right feel and look.
- Fill the tubes until they are about 90% full. This stops spills and leaves room for the cap.
- Keep your workspace neat and tidy. This makes you work faster and keeps things less messy.
- Let the filled tubes sit for 30 minutes to an hour. This helps the gloss get firm and stops leaks.
- Put your finished gloss in a cool, dry place. Keep it away from sunlight so it stays fresh.
- Clean your tools often. This stops germs from spreading and keeps each batch good.
Preparation
Sanitizing Tubes
Keeping your lip gloss tubes clean is the first step to making safe and high-quality products. You want to avoid germs and keep your gloss fresh for every use. Dirty tubes can cause problems for your lips and skin.
Tip: Always sanitize your tubes before you start. This helps protect you and anyone who uses your gloss.
Cleaning Solutions
You have several good options for cleaning your tubes. Here are some of the best choices:
- 70% isopropyl alcohol or ethyl alcohol
- Clean, lint-free cloths or paper towels
- Gloves
- Safety goggles
You should pick cleaning agents that match the material of your tubes. For example, use glass cleaner for glass tubes and stainless steel cleaner for metal ones.
Drying Methods
After cleaning, let your tubes air dry. This keeps them free from lint and dust. You can place them upside down on a clean towel or rack. Make sure they are completely dry before you fill them. Wet tubes can ruin your gloss or cause it to separate.
Note: Never rush the drying process. Moisture can lead to mold or spoil your product.
Tools Needed
Getting your tools ready before you start makes the process smooth and mess-free. You will need a few simple items to fill your lip gloss tubes like a pro.
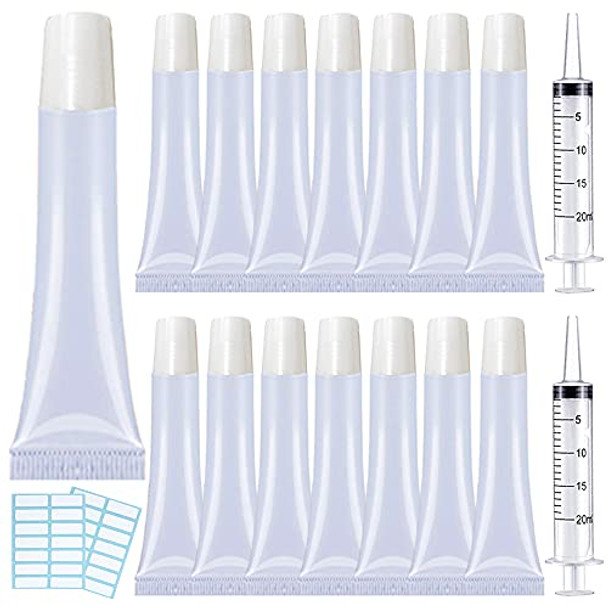
Syringe
A syringe helps you fill tubes with precision. You can control the amount of gloss and avoid spills. Syringes work well for thick or thin formulas.
Pipette
Pipettes are great for small batches or thin gloss. They let you add gloss slowly and neatly. You can use them for testing colors or making samples.
Squeeze Bottle
A squeeze bottle is handy for larger batches. You can fill many tubes quickly. This tool works best with runny or liquid gloss.
Gloves
Gloves keep your hands clean and protect your gloss from germs. You should wear gloves every time you handle your tubes or gloss.
Here’s a quick look at why professional-grade tools make a difference:
| Advantage | Description |
|---|---|
| Increased Production Speed | You can fill more tubes in less time. |
| Consistency in Filling | Every tube gets the same amount of gloss. |
| Reduced Waste | Less gloss spills or gets wasted. |
| Improved Hygiene Standards | No-touch filling lowers the risk of contamination. |
| Enhanced Precision | You get accurate filling for every tube. |
If you want reliable and clean tubes, check out Xinfly Packaging. Their products help you keep your gloss safe and fresh from start to finish.
Lip Gloss Formula
Mixing Gloss
You get to choose what goes into your lip gloss. Mixing your own formula lets you control the shine, color, and feel. Start with popular ingredients that work well together.
Ingredient Measurement
Accurate measurement makes a big difference. If you use too much oil or wax, your gloss might feel sticky or runny. When you measure each ingredient carefully, you get a smooth gloss that spreads easily and looks great.
Tip: Use a small kitchen scale or measuring spoons for best results. Even a tiny change in the amount of oil or wax can change how your gloss feels.
Here are some ingredients you might want to try:
- Castor oil
- Cera bellina (modified beeswax)
- Colored micas
- Glycerin
- Vitamin E
- Beeswax pastilles
- Jojoba oil
- Coconut oil
- Olive oil
- Essential oils (optional)
- Grapeseed or olive oil
- Cocoa butter or shea butter
- Vitamin E pills
You can mix and match these to create your own style. Some people like a glossy finish, while others want a creamy texture.
Texture
Getting the right texture is easy if you follow a few simple steps. You want your gloss to glide on smoothly and feel light on your lips. Here’s a quick way to mix your gloss:
- Prepare your base. Put 1 tablespoon of your gloss base in a microwave-safe bowl. Heat it in 10-second intervals until it melts a little but does not boil.
- Mix in oils. Add 1 teaspoon of carrier oil. This makes your gloss soft and moisturizing.
- Combine and stir. Mix everything until the color and flavor spread evenly.
- Adjust texture. If you want a smoother gloss, add a bit more oil.
You can test the texture by putting a small amount on your fingertip. If it feels too thick, add more oil. If it feels too thin, add a little more wax.

Compatibility
You want your gloss to work well with your lip gloss squeeze tubes. Some formulas are thick, while others are runny. The right mix helps your gloss stay fresh and easy to use.
Viscosity
Viscosity means how thick or thin your gloss is. If your gloss is too thick, it might clog the tube. If it’s too thin, it could leak out. Try to find a balance so your gloss flows smoothly but stays put.
Note: Test your gloss by squeezing a little into a tube. If it moves easily and doesn’t drip, you’ve got the right viscosity.
Separation
Sometimes, oils and waxes separate after you mix them. This can make your gloss look uneven. To prevent this, stir your mixture well and use ingredients that blend together. If you see separation, mix again before filling your tubes.
A good formula stays mixed and looks shiny every time you use it. You’ll notice your gloss lasts longer and feels better on your lips.
Filling Steps for Lip Gloss Squeeze Tubes
Workspace Setup
Organizing Tools
You want your workspace to feel organized before you start filling squeeze tubes. Place all your tools—syringe, pipette, squeeze bottle, gloves, and sanitized lip gloss squeeze tubes—within easy reach. Lay out parchment paper or a clean towel to catch any spills. Keep your tubes, funnels, and pipettes lined up so you can move quickly from one step to the next. This setup helps you work faster and keeps your process smooth.
Tip: Assemble everything you need before you begin. You’ll save time and avoid searching for tools with sticky hands.
Mess Prevention
Filling lip gloss tubes can get messy if you don’t prepare. Wipe down your workspace with alcohol wipes. Wear gloves to protect your product quality and keep germs away. Clean spills right away using warm, soapy water or a gentle solvent. This keeps your area safe and prevents gloss from hardening on surfaces.
- Lay down parchment paper to catch drips.
- Keep a damp cloth nearby for quick cleanups.
- Use sterilized equipment to protect your gloss.
A clean workspace means better product quality and less stress during the filling process.
Easy Way to Fill Lip Gloss Tubes
Using Syringe
The easy way to fill lip gloss tubes starts with a syringe. This tool gives you control and helps you avoid spills. Here are the steps:
- Prepare your gloss and make sure it’s at the right temperature.
- Draw the gloss into the syringe.
- Hold the tube upright and insert the syringe tip close to the bottom.
- Fill slowly from the bottom up. This reduces air bubbles and keeps the gloss smooth.
- Tap the tube gently to settle the gloss.
You get precise filling and less waste. Syringes work well for thick or thin formulas.
Using Pipette
A pipette is perfect for small batches or thin gloss. You can fill lip gloss tubes with care and accuracy. Here’s how you do it:
- Squeeze the pipette bulb and draw up your gloss.
- Place the tip near the bottom of the tube.
- Release the gloss slowly, keeping the pipette in contact with the product.
- Fill one-third at a time, then tap the tube to remove air pockets.
Droppers and pipettes help you control the amount and protect delicate ingredients. This method keeps your product quality high and reduces contamination.
Using Squeeze Bottle
If you want to fill many tubes quickly, use a squeeze bottle. This tool works best for runny gloss. Follow these steps:
- Pour your gloss into the squeeze bottle.
- Position the nozzle close to the bottom of the tube.
- Squeeze gently and fill from the bottom up.
- Go slow to avoid rushing and trapping air.
- Tap the tube after filling.
A squeeze bottle makes the process fast and easy. You can fill lip gloss tubes in batches and keep your workspace clean.
Fill Lip Balm Squeeze Tubes
Filling Level
When you fill lip balm squeeze tubes, leave a little space at the top. Don’t fill all the way to the rim. This space lets you add the cap or applicator without making a mess. If you overfill, the gloss can spill out when you seal the tube.
Note: Aim to fill about 90% of the tube. This gives you room for the cap and keeps your gloss from leaking.
Air Bubble Removal
Air bubbles can ruin your gloss and lower product quality. You want to avoid them during filling squeeze tubes. Try these steps:
- Fill slowly and keep the nozzle close to the tube opening.
- Tap the tube gently after each third of filling.
- Let the formula sit for a few minutes to release trapped air.
- For sensitive formulas, consider nitrogen flushing to push out oxygen.
Degassing your gloss before filling helps too. You can use vacuum mixing or let the gloss rest to release air. These techniques keep your gloss smooth and professional.
Tip: Always check for bubbles before you seal the tube. Smooth gloss looks better and lasts longer.
Let the contents solidify before you cap the tube. This prevents leaks and keeps your gloss fresh.
Sealing Tubes
Solidification
After you fill your lip gloss tubes, you need to let the gloss set. This step is called solidification. It helps your gloss stay inside the tube and keeps it from leaking out when you add the cap. If you skip this part, you might end up with a sticky mess.
Set your filled tubes upright on a clean tray or towel. Give them time to cool down and firm up. Most gloss formulas need about 30 minutes to an hour to solidify. If your gloss feels warm or runny, wait a bit longer. You can gently tap the tubes to check if the gloss has settled.
Tip: Don’t rush this step. Letting your gloss solidify fully will help you avoid leaks and keep your product looking professional.
If you work in a warm room, try moving the tubes to a cooler spot. This helps the gloss set faster. Some people even use a small fan to speed things up. Just make sure the tubes stay upright and don’t tip over.
Capping
Once your gloss has solidified, you’re ready to seal the tubes. This step keeps your gloss fresh and safe. You want to make sure every tube is closed tightly.
Start by wiping the tube opening with a clean cloth. This removes any gloss that might have spilled. Next, press the cap or applicator onto the tube. Twist or snap it into place, depending on your tube style. You should hear a click or feel the cap lock in.
Note: Always double-check that the cap is secure. A loose cap can lead to leaks or dried-out gloss.
In the cosmetic industry, brands use different sealing methods to protect products. Here’s a quick look at the most common ways to seal squeeze tubes:
| Sealing Method | Description |
|---|---|
| Heat Seals | Applied at the base after filling, commonly used in skincare and personal care tubes. |
| Foil Seals | Provide a peel-away barrier under the cap, ensuring product freshness. |
| Induction Seals | Uses electromagnetic energy to bond a foil to the opening, ideal for high-security products. |
For DIY projects and small batches, you usually just need to cap the tube tightly. If you want extra protection, you can use foil seals under the cap. These seals keep air out and help your gloss last longer.
After capping, give each tube a gentle squeeze. Check for leaks or loose caps. If everything looks good, your lip gloss squeeze tubes are ready for use or sale!
Pro Tip: Store your finished tubes upright for a few hours after sealing. This helps the gloss settle and keeps the cap area clean.
Cleaning Tools
Keeping your tools clean makes a huge difference in your lip gloss results. You want every batch to look great and stay safe for anyone who uses it. Let’s talk about how you can clean your tools between uses and stop colors from mixing.
Between Uses
Washing
You should wash your applicators and mixing tools every time you switch colors or batches. This step helps you avoid germs and keeps your gloss fresh. Start by rinsing the applicator under lukewarm water. Remove any leftover gloss or balm. Next, add a small amount of mild soap or makeup brush cleaner to the tip. Rub the applicator between your fingers to create a gentle lather. Rinse until the water runs clear and no soap remains. Dab the tool with a clean towel and let it air dry before you use it again.
Tip: Clean brushes and applicators regularly. This keeps bacteria away and helps your tools last longer.
Sanitizing
Washing removes most of the gloss, but sanitizing takes it a step further. You want to use a solution with at least 70% isopropyl alcohol. Spray the exposed part of your applicator or tool and let it evaporate. This kills germs and keeps your gloss safe. If you use disposable applicators, toss them after each use. For reusable tools, deep clean them once a week to remove any product buildup.
- Use alcohol sprays for quick sanitizing.
- Deep clean brushes with special cleaning tools.
- Always let tools dry completely before storing.
Preventing Color Mixing
Dedicated Tools
You know how frustrating it feels when colors mix and ruin your batch. The best way to stop this is by using dedicated tools for each color or formula. Set aside a separate syringe, pipette, or spatula for every shade you make. Label your tools so you don’t mix them up. If you work with lots of colors, disposable applicators help you keep things neat.
| Tool Type | Use Case | Benefit |
|---|---|---|
| Syringe | Thick gloss | No color mixing |
| Pipette | Thin gloss | Precise application |
| Disposable wand | Samples or testers | Easy cleanup |
Note: Disposable tools help you avoid cross-contamination. You can transfer gloss to a tray and apply from there.
Rinsing
Rinsing is a quick way to keep your tools clean between colors. After you finish with one shade, rinse the applicator under lukewarm water. Make sure you remove all traces of gloss. You can use a gentle soap if needed. Dry the tool with a clean towel and let it air dry before using it again. This step stops colors from mixing and keeps your gloss looking perfect.
- Rinse the applicator under lukewarm water.
- Add a drop of mild soap and rub gently.
- Rinse until the water runs clear.
- Dry with a towel and let air dry.
You want every gloss batch to shine with its true color. Clean tools help you get there every time!
Troubleshooting
When you fill lip gloss squeeze tubes, you might run into a few problems. Don’t worry! You can fix most issues with simple steps. Let’s look at the most common challenges and how you can solve them.
Air Bubbles
Air bubbles can make your gloss look uneven or cause it to leak. You want your gloss to look smooth and professional. Here’s how you can remove air bubbles:
Removal Techniques
- Fill your tube slowly from the bottom up. This helps push air out as you add gloss.
- Tap the tube gently after each third of filling. This makes bubbles rise to the top.
- Let the tube sit for a few minutes before sealing. Air bubbles will float up and disappear.
- Use a syringe or pipette for better control. These tools help you avoid trapping air.
- If you see bubbles after filling, squeeze the tube gently to release them before capping.
Tip: Always check for bubbles before you seal the tube. Smooth gloss looks better and lasts longer.
You might also notice other issues during filling. Here are some frequent troubleshooting problems:
- Incorrect material selection can spoil your gloss.
- Not testing compatibility may cause leaks.
- Poor quality control leads to inconsistent results.
- Wrong cap or closure frustrates users.
- Overlooking tube size can waste product.
- Skipping durability tests can cause failures.
Overflow
Overflow happens when you fill the tube too much. Gloss spills out and makes a mess. You want to avoid this problem by following a few easy steps.
Filling Tips
- Leave a small air gap at the top of the tube—about 2–3mm. This gives space for expansion and prevents overflow.
- Test your gloss’s thickness. If it’s too runny, adjust your ingredients so it flows smoothly but doesn’t drip.
- Use a funnel or pipette to fill the tube to about 90% capacity. Pour slowly and steadily.
Note: Filling slowly helps you control the amount and keeps your workspace clean.
If you use the right tube size and fill carefully, you’ll avoid waste and keep your gloss looking neat.
Clogs
Clogs can stop your gloss from coming out of the tube. This can frustrate you and anyone who uses your product. You can fix clogs with a few simple tricks.
Clearing
- Check for dried residue around the cap or threads. Wipe it away with a clean cloth.
- Store your tubes in a cool, dry place. Humidity can make gloss harden and clog the opening.
- Use hydrating ingredients like vitamin E or shea butter. These keep your gloss soft and easy to squeeze.
- If your gloss hardens, soak the tube tip in warm water for a few minutes. This softens the product and clears the clog.
Pro Tip: Always close your tubes tightly after each use. This keeps air out and stops your gloss from drying.
Troubleshooting helps you make better gloss every time. You’ll keep your tubes clean, your product fresh, and your customers happy!
Tips and Storage

Efficiency
Batch Filling
You want to fill lip gloss squeeze tubes quickly and neatly, especially when you make a big batch. Start by cleaning and sterilizing your tubes. This step removes any dirt or bacteria from the packaging materials. Next, choose the right filling method for your formula. You can use a small funnel, syringe, or even a squeeze bottle. Hold each tube upright and fill it about 90% full. Wipe away any extra gloss and press the cap firmly to seal.
Here are some efficient batch filling techniques:
- Use a syringe or funnel for precise filling.
- Fill each tube upright to avoid spills.
- Seal tubes right after filling to keep your gloss fresh.
Some people use vacuum filling or piston filling for larger batches. These methods help you fill tubes faster and keep air out. Gravity filling works well for thin gloss. You can try different methods to see which one fits your process best.
Tip: Organize your workspace before you start. Line up your tubes and tools so you can move quickly from one step to the next.
Hygiene
Gloves
Clean hands and gloves make a big difference in your lip gloss results. Always wear gloves when you handle packaging or gloss. This keeps germs away and protects your skin. Regularly clean and sterilize your equipment. A clean work area helps you avoid contamination and keeps your gloss safe for everyone.
- Clean and sanitize your workspace before you begin.
- Wash your tools after each batch.
- Replace gloves if they get sticky or dirty.
Lip gloss tubes can collect bacteria, dirt, and oils. Proper cleaning extends the life of your gloss and keeps your lips healthy. You want your nourishing ingredients to stay pure and effective.
Note: Never skip the cleaning step. It helps your gloss last longer and keeps your customers happy.
Storage
Temperature
Storing your finished tubes in the right place helps your gloss stay fresh. Keep your lip gloss at room temperature, between 68°F and 77°F. Avoid heat sources like radiators or sunny windows. High temperatures can change the texture and make your gloss runny or hard.
- Store gloss in a cool, dry spot.
- Use temperature-controlled storage if you live in a hot climate.
- Clean your storage area often to prevent contamination.
Light
Light can damage your gloss and shorten its shelf life. Keep your tubes away from direct sunlight. Use airtight containers to protect your gloss from moisture and dust. A dry environment helps your nourishing ingredients stay potent.
| Storage Tip | Benefit |
|---|---|
| Cool, dry place | Prevents spoilage |
| Away from sunlight | Maintains color and texture |
| Airtight containers | Keeps moisture out |
You want your packaging to look professional and keep your gloss safe. Xinfly Packaging offers high-quality tubes that protect your product from light and heat. Their packaging helps you keep your gloss fresh and ready to use.
Pro Tip: Check your tubes every few weeks. Make sure the gloss looks and smells good. If you see changes in texture or color, it’s time to make a new batch.
You now know how to fill lip gloss squeeze tubes like a pro. Start with clean tubes, use the right tools, and keep your workspace tidy. Experts say precision and airless filling help you avoid waste and keep your gloss fresh. Check out this quick guide:
| Feature | Benefit |
|---|---|
| Precision Filling | No wasted gloss, every tube looks great. |
| Airless Filling | Gloss stays safe and lasts longer. |
Give it a try! Xinfly Packaging has your back. You can create beautiful gloss tubes for yourself or your business.
How to Fill Lip Gloss Squeeze Tubes – Frequently Asked Questions
Clean, precise, and leak-proof filling for lip gloss: tools, temperatures, viscosities, orifices, wipers, sealing, bubble control, hygiene, compliance, and QA tests.
1) What equipment do I need to fill lip gloss tubes neatly?
2) Should I fill from the orifice or the tail?
3) What’s the right fill temperature/viscosity?
4) How much headspace should I leave?
5) What orifice size is best for lip gloss?
6) How do I avoid bubbles and voids?
7) Do I need a wiper/insert in the neck?
8) How do I seal the tail securely?
9) Can I add glitter, mica, or flavor oils safely?
10) How do I keep everything hygienic?
11) What tests should I run before shipping?
12) Do pigments or pearls stain tubes?
13) What cap and tip options work best?
14) How do I label and code small tubes?
15) Why consider Xinfly Packaging for lip gloss tubes?
Ready to customize your packaging? Contact our team for detailed pricing, MOQ flexibility, and fast production samples.