
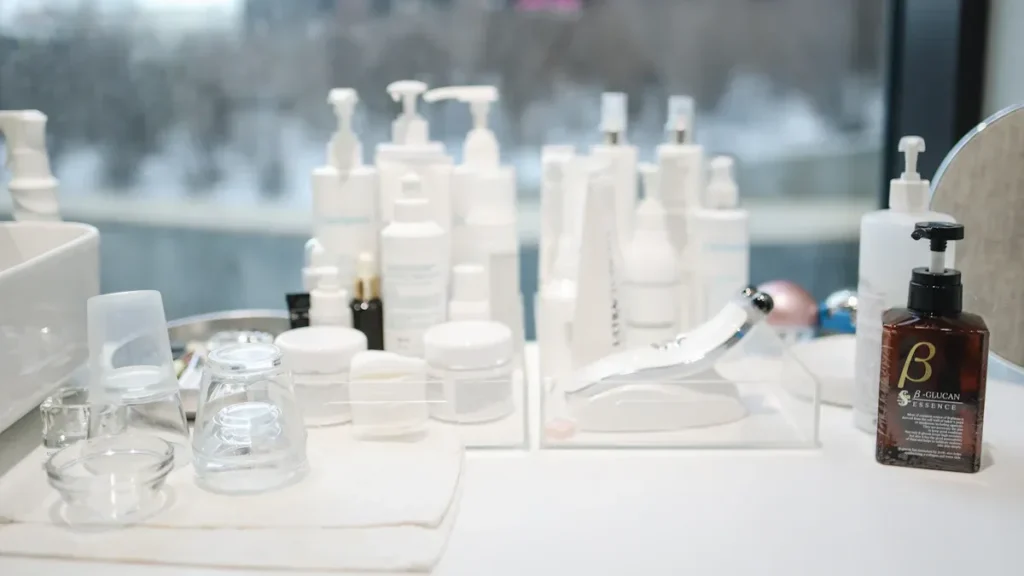
How do you refill empty cosmetic tubes easily
Refilling empty cosmetic tubes is easy with the right tools. You can use a syringe, funnel, or spatula to fill tubes by hand. Machines can help you fill tubes faster. Many people refill things like lip balms and foundations. They do this because they use these products every day. Here are the main ways to fill cosmetic tubes:
| Method Type | Description |
|---|---|
| Fully Automatic Machines | These machines do everything by themselves. They keep things clean and accurate. |
| Semi-Automatic Machines | These machines work fast but need some help from people. |
| Manual Filling Equipment | These tools are used by hand or with little help from machines. |
You only need gentle pressure and a few steps. Anyone can fill tubes without making a mess if they use basic tools.
Key Takeaways
- Refilling cosmetic tubes is simple with tools like syringes, funnels, and spatulas. Choose the right tool based on product consistency.
- Always clean and sanitize your tubes before refilling. This keeps your products safe and fresh.
- Use a syringe for thick creams and gels to avoid spills. A funnel works best for runny liquids.
- Fill tubes slowly from the bottom up to prevent air bubbles. Tap the tube gently to release trapped air.
- Leave a small space at the top of the tube before sealing. This prevents overflow and ensures a tight seal.
- For large batches, consider using filling machines. They save time and provide consistent results.
- Check the condition of your tubes before filling. Cracks or weak spots can lead to leaks and product waste.
- Store filled tubes upright in a cool, dry place. Label them with the filling date to track freshness.
Tools for Cosmetic Tubes
Syringe
You might find that a syringe is one of the easiest tools for refilling cosmetic tubes. It gives you control over how much product you push into the tube. You can use a syringe for thick creams, gels, or even liquid foundations. If you want to fill a lip balm tube, a syringe helps you avoid spills and keeps things neat. You just pull up the product and gently press it into the tube. This method works well for small batches or when you want to refill top-notch lip balm tubes at home.
Tip: Use a wide-tip syringe for thicker products. This helps you avoid clogging and makes the filling process smoother.
Professional guides often recommend machines for large batches, but for home use, syringes are a favorite. You can use them for lotions, creams, and even toothpaste. If you use a lip balm tube filling tray, a syringe makes it easy to fill each slot without making a mess.
Funnel
A funnel is another handy tool for filling cosmetic tubes. You can use a funnel for products that flow easily, like lotions or oils. Just place the funnel in the tube opening and pour your product in. This tool works best for runny or liquid products. You don’t need much skill to use a funnel, and it helps you avoid spills.
Here’s a quick look at how syringes and funnels compare for different products:
| Tool | Effectiveness | Efficiency |
|---|---|---|
| Syringe | Great for thick creams and gels | Precise, less mess |
| Funnel | Best for liquids and runny lotions | Fast, easy for large batches |
| Spatula | Good for scooping and spreading | Works for thicker products |
You can see that each tool has its own strengths. If you want to fill cosmetic tubes with thick products, a syringe or spatula works best. For thin liquids, a funnel saves time.
Spatula
A spatula is perfect for scooping and spreading thick creams or balms into cosmetic tubes. You can use a spatula to push product into the tube and smooth out the top. This tool works well for homemade products or when you want to refill tubes with a thicker consistency. You don’t need any special skills to use a spatula. Just scoop, push, and smooth.
Note: Always use a clean spatula to keep your products safe and hygienic.
If you want to fill tubes with very thick products, a spatula is your best friend. You can use it for creams, balms, and even toothpaste. For larger batches, professional machines like cosmetic filling machines or lotion filling machines make the process faster. But for home use, spatulas, syringes, and funnels cover most needs.
Machine Filling
If you want to fill a lot of cosmetic tubes quickly, machine filling might be your best choice. You can use machines for lotions, creams, gels, or even toothpaste. These machines help you save time and keep your workspace clean. You don’t have to worry about spills or uneven amounts in each tube.
There are different types of filling machines. Some work automatically, while others need you to press a button or guide the tube. Here’s a quick look at the main types:
| Machine Type | How It Works | Best For |
|---|---|---|
| Automatic Filler | Fills tubes by itself | Large batches |
| Semi-Automatic Filler | Needs some help from you | Medium batches |
| Manual Filler | You control the filling | Small batches, home use |
You might see automatic fillers in big factories. These machines fill hundreds of tubes in minutes. If you run a small business or make products at home, a manual or semi-automatic filler works well. You can find tabletop machines that fit on your counter. They don’t take up much space and are easy to clean.
Tip: Always check the thickness of your product before choosing a machine. Some machines work better with thin liquids, while others handle thick creams.
Machine filling gives you more control over how much product goes into each tube. You can set the amount and let the machine do the rest. This helps you avoid waste and keeps your products looking professional. You don’t have to squeeze or push the product by hand. The machine uses gentle pressure to fill each tube evenly.
If you want to fill lip balm tubes, look for machines with special attachments. These help you fill small tubes without making a mess. For lotions or gels, you can use a machine with a pump or nozzle. You just place the tube under the nozzle and press start.
Here are some reasons you might choose machine filling:
- You want to fill many tubes fast.
- You need each tube to have the same amount.
- You want less mess and easy cleanup.
- You run a small business or make gifts for friends.
You don’t need special training to use most filling machines. Many come with simple instructions. You can watch a video or read a guide to get started. If you ever spill product, just wipe the machine and keep going.
Note: Clean your machine after each use. This keeps your products safe and your machine working well.
Machine filling makes the whole process easier. You get neat, professional-looking tubes every time. If you want to save time and effort, try using a filling machine for your next batch.
Preparing to Fill a Cosmetic Tube
Clean Tubes
Before you start prepping your cosmetics tubes, you need to make sure every tube is clean. Grab some warm water and mild soap. Wash the tubes inside and out. Rinse them well so no soap stays behind. Dry each tube with a clean towel or let them air dry. If you want extra safety, use rubbing alcohol to sanitize the tubes. This step keeps your ingredients fresh and stops germs from getting inside.
Tip: Always use clean hands and tools when you handle cosmetic tubes. This helps keep your products safe for your skin.
Check Tube Condition
Take a close look at each tube before you fill it. You want to check for cracks, holes, or weak spots. Squeezable tubes work best because they let you control how much product comes out. If you see any damage, pick a new tube. Good tube integrity means your ingredients stay fresh and your product works well.
Here’s why tube condition matters:
- The integrity of tubes keeps your product quality high.
- Proper sealing stops contamination, which is important for refilling success.
- Squeezable tubes help you use every drop and reduce waste.
- Machines use heat or ultrasonic sealing to make airtight seals.
- Quality control checks for leaks and sealing problems.
- Bad seals can cause leaks and ruin your product, which can make customers unhappy.
Prep Product
Now you need to get your ingredients ready. If you use thick creams, melt them a little so they flow better. For liquid products, mix your ingredients until smooth. Make sure there are no lumps or clumps. You want your product to fill the tube easily and evenly.
Here’s a simple table to show how to prepare different products for tube filling:
| Step | Description |
|---|---|
| Filling Process | Use a calibrated piston or syringe to measure your ingredients and fill tubes with the right amount. |
| Sealing Techniques | Try heat sealing or ultrasonic welding to close tubes and keep your ingredients safe. |
| Quality Control Measures | Check each tube for leaks, weight, and sealing before you use or share your product. |
If you use homemade ingredients, test a small batch first. This helps you see if the texture works for your cosmetic tubes. Always mix your ingredients well so every tube gets the same quality.
Note: If you want your product to last longer, store your ingredients in a cool, dry place before you fill the tubes.
Getting ready to fill tubes takes a little time, but it makes the whole process easier. Clean tubes, strong seals, and well-mixed ingredients help you get the best results every time.
Refilling Process
Fill a Cosmetic Tube
Ready to fill a cosmetic tube? You can do this at home with just a few tools. Grab your clean tube, your product, and either a syringe or a funnel. Start by choosing the right tool for your product’s texture. If you have a thick cream, a syringe works best. For runny lotions, a funnel makes the job easier.
Here’s a simple way to fill a cosmetic tube:
- Place the tube upright on a flat surface.
- If you use a syringe, pull up your product and insert the tip deep into the tube. For a funnel, set it in the opening.
- Fill slowly from the bottom up. This helps keep air bubbles out.
- Keep your tool touching the product as you fill. This trick pushes air out and gives you a smooth finish.
- Stop before the tube is completely full. Leave a little space at the top for sealing.
Tip: Don’t rush. Slow and steady filling gives you a cleaner result and helps avoid spills.
Product consistency changes how you fill tubes. Thin products like serums flow easily and fill fast. Thick creams or gels take more time and may need extra pressure. If you use a machine, you might need to adjust the settings for thicker products. Sometimes, you have to fill thick products by hand because machines work better with liquids.
Here’s a quick table to show how product consistency affects filling:
| Product Type | Best Tool | Filling Speed | Special Tips |
|---|---|---|---|
| Thin liquids | Funnel | Fast | Use volumetric fillers |
| Thick creams/gels | Syringe | Slow | Fill slowly, avoid clogging |
| Balms | Spatula | Medium | Scoop and press gently |
Fill Lip Balm Tubes
Filling lip balm tubes is a little different. You usually work with thicker products and smaller openings. If you love making your own lip balm recipes, you’ll want to get this step right.
Here’s how you can fill lip balm tubes without making a mess:
- Melt your balm mixture until it’s smooth and pourable.
- Use a syringe or a small funnel to fill each tube. Syringes give you more control, especially for thicker balms.
- Fill each tube from the bottom up. This helps keep air bubbles out.
- If you see bubbles, gently tap the tube on the counter. You can also press the tube to push out trapped air before sealing.
Note: Always fill lip balm tubes slowly. Rushing can cause spills and uneven filling.
If you’re filling lip balm tubes for gifts or to sell, try using a filling tray. This holds the tubes upright and makes the process faster. You can fill several tubes at once and keep your workspace tidy.
Seal Tubes
After you finish filling, you need to seal the tubes. Sealing keeps your product fresh and stops leaks. There are a few ways to seal tubes, depending on what you have at home.
- For squeeze tubes, press the open end flat and use a heat sealer or a flat iron. Hold for a few seconds until the end sticks together.
- For lip balm tubes, snap on the cap tightly. Make sure you hear a click so the tube is closed.
- If you use a machine, follow the instructions for heat or ultrasonic sealing.
Before you seal, gently press the tube to remove any air bubbles. This step helps your product last longer and look professional.
Tip: Always check for leaks after sealing. Squeeze the tube gently. If you see product coming out, reseal the end.
Using proper filling techniques makes your cosmetic tubes look neat and keeps your product safe. You avoid spills, prevent air bubbles, and get a smooth finish every time. Whether you fill lip balm tubes or lotion tubes, these steps help you get the best results.
Tips for Filling Your Cosmetics Tubes
Avoid Spills
Nobody likes a messy workspace or wasted product. You can keep things neat when you fill cosmetic tubes by following a few simple steps:
- Pour your product at a temperature between 140°F and 158°F. This helps the product flow smoothly but keeps it from getting too runny.
- Don’t fill the tube all the way to the top. Leave about 1–2 mm of space. This small gap stops the product from overflowing when you seal the tube.
- Let the tubes cool while standing upright. Give them time to settle at room temperature before you put on the cap. This keeps leaks away.
- Try not to move the tubes from hot to cold places too quickly. Sudden changes can cause condensation or stress the tube lining.
- If you need to transport filled tubes, line your box or tray with parchment paper. This catches any drips and keeps everything tidy.
Tip: Slow and steady pouring helps you avoid spills and gives you more control.
Prevent Air Bubbles
Air bubbles can make your product look uneven and waste space inside the tube. You can stop bubbles from forming with these tricks:
- Fill the tube from the bottom up. Keep your tool (like a syringe or funnel) close to the product as you fill.
- Tap the tube gently on the counter after filling. This helps trapped air rise to the top.
- Don’t rush. Pouring too fast pulls in extra air.
- For thick products, use a spatula to press the product down and smooth out the top.
Note: If you see bubbles after sealing, you can gently squeeze the tube to push them out before the product sets.
Use Light Pressure
Using the right amount of pressure makes a big difference. Too much force can cause spills or damage the tube. Light, steady pressure gives you the best results:
- Squeeze the syringe or press the funnel gently. Let the product flow at its own pace.
- If you use a machine, set it to a low or medium speed for better control.
- Always check the tube for weak spots before you start. A strong tube can handle gentle pressure without leaking.
Remember: Light pressure keeps your workspace clean and your product looking professional.
Minimize Waste and Ensure Hygiene
You want to get the most out of your ingredients and keep your products safe. Here are some ways to minimize waste and keep things clean:
| Strategy | Description |
|---|---|
| Proper machine calibration | Make sure machines fill the right amount, so you don’t lose product. |
| Regular maintenance | Keep your tools and machines in good shape to avoid breakdowns and spills. |
| Automation | Machines can help you fill tubes evenly and reduce mistakes. |
| Operator training | Learn how to use your tools and machines for the best results. |
| Monitoring production data | Watch for patterns or problems so you can fix them quickly. |
For hygiene, always clean your tools and workspace before and after filling your cosmetics tubes. Use safe cleaning agents and rinse everything well. If you use machines, take them apart and clean all the parts. Train yourself or your helpers on good hygiene habits. This keeps your products safe for everyone.
Tip: A clean workspace and careful filling help you make high-quality products every time. 🧴✨
Troubleshooting
Clogged Tubes
You might notice that sometimes your tubes get clogged during refilling. This can happen if the product dries out or if you use thick formulas. When you see a clog, don’t panic. You can fix it with a few simple steps:
- Clean the piston tube to remove any solidified product. This helps clear the blockage and gets your tube working again.
- Use warm water or a gentle cleanser to rinse out any leftover product.
- Check for any foreign matter inside the tube before you start filling. A quick inspection saves you time later.
If you keep your workspace clean and check your tubes before each use, you’ll avoid most clogs. Regular cleaning makes the whole process smoother.
Leaks
Leaks can ruin your hard work and waste your product. You want your cosmetic tubes to stay sealed and fresh. Here’s how you can prevent leaks:
The latest AI-enabled solutions can spot tiny seal defects that you might miss. These smart systems help you catch leaks before they become a problem.
- Try using a leak tester. This tool applies gentle pressure to your tube and checks if the seal holds up.
- Make sure you use the right sealing method for your tube type. Heat sealing works well for squeeze tubes, while snap-on caps are best for lip balm tubes.
- Always check the tube for cracks or weak spots before you fill it.
If you notice a leak after sealing, squeeze the tube gently and look for any product escaping. Reseal the end if needed. A good seal keeps your product safe and your tubes looking professional.
Thick Products
Thick creams and balms can be tricky to fill. You might find that they block the opening or slow down the process. Here’s what you can do to make filling easier:
- Clean and inspect your hoses before you start. Make sure there’s no damage or leftover product inside.
- Check the viscosity of your formula. If it’s too thick, warm it up a little to help it flow better.
- Adjust your equipment settings. Lower the filling speed and use a wider opening if possible.
- Keep your workspace clean. This stops germs from getting into your product.
- Choose the right filling method. Manual filling works for small batches, while semi-automatic or automatic machines help with larger amounts.
You can also look at common troubleshooting issues in the table below:
| Issue Description | Possible Cause | Solution |
|---|---|---|
| Excessive temperature causing malfunctions | Incorrect temperature settings | Check actual temperature against required temperature; ensure heating head is correctly placed. |
| End seal splits from the middle of the hose | Insufficient heating head size | Replace with a larger heating head. |
| “Eye bags” appear under the sealing line | Incorrect height of air outlet | Adjust the height of the air outlet of the heating head. |
| Middle of the tail end of the hose is sunken | Wrong size of the tube cup | Ensure the tube cup size allows for natural change of tube shape without tightness. |
If you follow these tips, you’ll handle thick products with ease and keep your tubes working well. Troubleshooting helps you get the best results every time you refill cosmetic tubes.
Safety and Hygiene
Sanitize Tools
You want your cosmetic tubes to stay clean and safe. Before you start filling, you should always sanitize your tools and tubes. This helps keep germs away and protects your skin. Here’s a simple way to clean everything:
- Wash your mascara wand with hot water and soap. Make sure you remove all old product.
- Spray the wand with isopropyl alcohol. Let it dry completely.
- Fill a bowl with warm water and a drop of liquid soap. Mix it well.
- Take the wand out of your empty mascara tube. Clean the wand in the soapy water.
- Put the mascara tube in the bowl. Let it soak for five to ten minutes.
- Use a soft spoolie brush to scrub inside the tube. This helps remove leftover makeup.
- Rinse the tube with warm water until all the soap is gone.
- Let the tube air dry before you refill it.
You can use these steps for other cosmetic tubes too. Always clean your spatulas, syringes, and funnels after each use. If you skip cleaning, you might get bacteria in your product. That can cause skin problems or make your cosmetics spoil faster.
Tip: Let your tubes and tools dry in a clean spot. Don’t rush this step. Dry tools work best for safe filling.
Store Safely
After you finish filling your tubes, you need to store them the right way. Safe storage keeps your products fresh and stops leaks or spills. You should keep your cosmetic tubes in a cool, dry place. Avoid direct sunlight because heat can break down your product.
Here are some easy storage tips:
- Stand your tubes upright so the product settles at the bottom.
- Use airtight containers or zip bags if you want extra protection.
- Label each tube with the date you filled it. This helps you track freshness.
- Keep tubes away from sharp objects that could poke holes or cause leaks.
Regulations in different regions also guide how you should handle packaging. For example, in the European Union, brands must design packaging for reuse or recycling by 2030. They also need to reduce packaging waste and take responsibility for the end-of-life of their packs.
| Regulation | Key Points |
|---|---|
| EU Packaging and Packaging Waste Regulation (PPWR) | All packaging must be designed for reuse or high-quality recycling by 2030 |
| 5% packaging-waste reduction per capita by 2030 | |
| Mandatory Extended Producer Responsibility (EPR) fees make brands financially responsible for the end-of-life of their packs |
If you follow these rules, you help protect the environment and keep your cosmetic tubes safe. Good storage and cleaning habits make your products last longer and work better.
Remember: Clean tools and smart storage keep your cosmetics safe for you and everyone who uses them. 🧼🗃️
You can refill cosmetic tubes quickly by following a few easy steps. Choose the right tools, clean your workspace, and fill each tube with care. When you use proper methods, you get precise results, save money, and help the planet.
- You reduce plastic waste and support a greener future.
- Refills cost less than buying new products.
- You minimize spills and keep your products fresh.
| Filling Method | Speed (bags/hour) | Product Waste Impact |
|---|---|---|
| Manual | 100-150 | Higher waste, less consistency |
| Automated | 500-1,000 | Lower waste, more consistent tubes |
Try both manual and machine filling to see what works best for you!
Refilling Empty Cosmetic Tubes – Frequently Asked Questions
Tools, methods and safety for quick, clean refills: choosing the right tube, prepping formulas, filling techniques, sealing, labeling, hygiene and testing.
1) What tube types are easiest to refill?
2) What tools do I need for a clean refill?
3) How do I prep the tube before refilling?
4) Should I sterilize the formula?
5) What’s the easiest way to get product into the tube?
6) How much headspace should I leave?
7) How do I seal the tail after refilling?
8) Can I refill through the orifice instead of the tail?
9) How do I avoid bubbles and voids?
10) What orifice size suits my formula?
11) Any safety tips for home refilling?
12) How do I perform a quick leak test?
13) Can I reuse tubes indefinitely?
14) How should I label and store refilled tubes?
15) Why choose Xinfly Packaging for refillable projects?
Ready to customize your packaging? Contact our team for detailed pricing, MOQ flexibility, and fast production samples.