How to Seal Plastic Cosmetic Tubes: Expert Guide for Perfect Packaging
Sealing plastic cosmetic tubes is a crucial step in the packaging process for skincare, makeup, and personal care products. Whether you’re a small business owner, a DIY cosmetic creator, or part of a large manufacturing line, understanding the sealing process ensures your products remain fresh, leak-proof, and visually appealing. The right sealing technique not only protects the product but also reflects your brand’s commitment to quality.
In this guide, we’ll walk you through how to seal plastic cosmetic tubes step-by-step, from basic at-home methods to professional industrial sealing solutions. We’ll cover the different types of plastic tubes, sealing techniques, safety measures, and cost considerations—so by the end, you’ll be able to choose the best method for your needs.
Why Sealing Plastic Cosmetic Tubes Matters
Preserving Product Freshness and Quality
A proper seal acts as a barrier against air, moisture, and external contaminants. This is especially important for products like creams, serums, and lotions, where exposure to oxygen can degrade active ingredients over time.
Preventing Contamination and Leakage
Without a secure seal, cosmetic products risk bacterial contamination or leakage during transportation. A tight, professional seal ensures your customers receive the product exactly as intended.
Enhancing Brand Presentation and Customer Trust
Packaging is often the first impression a customer has of your brand. A poorly sealed tube can lead to a negative perception, even if the product inside is high quality. Crisp, neat seals communicate professionalism and reliability.
Understanding Plastic Cosmetic Tubes
Types of Plastic Used (LDPE, HDPE, PP, etc.)
- LDPE (Low-Density Polyethylene): Flexible and commonly used for squeezable tubes.
- HDPE (High-Density Polyethylene): More rigid, offering durability and shape retention.
- PP (Polypropylene): Resistant to heat and chemicals, often used for specialized products.
Common Tube Shapes and Sizes
From slim, travel-friendly tubes to large, family-sized packaging, cosmetic tubes come in a variety of shapes—round, oval, and even custom designs—to suit product type and branding.
Tube Components: Body, Shoulder, and Cap
Understanding the anatomy of a tube helps in sealing:
- Body: Holds the product.
- Shoulder: Connects the body to the cap.
- Cap: Provides the final closure but does not replace the need for a sealed end.
Sealing Methods for Plastic Cosmetic Tubes
Choosing the right sealing method depends on the type of plastic, your production scale, and your budget. The most common sealing techniques fall into three categories: heat sealing, cold sealing, and crimping.
Heat Sealing Method
Heat sealing is the most popular technique for how to seal plastic cosmetic tubes because it creates a strong, tamper-proof bond between the layers of plastic. This process uses high temperatures to melt the inner surfaces of the tube, which then fuse together as they cool.
Hot Air Tube Sealing
Hot air sealing uses a blast of heated air to soften the inside of the tube. A mechanical clamp then presses the softened plastic together to form a permanent seal.
Advantages:
- Works with most tube materials.
- Produces a neat, uniform seal.
- Adjustable for different tube diameters.
Disadvantages:
- Requires specialized equipment.
- Overheating can damage the tube.
Ultrasonic Tube Sealing
Instead of heat, ultrasonic sealing uses high-frequency vibrations to create friction, melting the plastic at a molecular level.
Advantages:
- No risk of product heat damage.
- Fast sealing speed.
- Energy-efficient.
Disadvantages:
- More expensive machinery.
- Best suited for certain plastic blends.
Cold Sealing Method
Cold sealing doesn’t use heat but instead relies on adhesives or pressure-sensitive films. This method is rarely used for cosmetics because it’s less durable and may not be airtight, but it can work for short-term applications or for products sensitive to heat.
Crimping Method
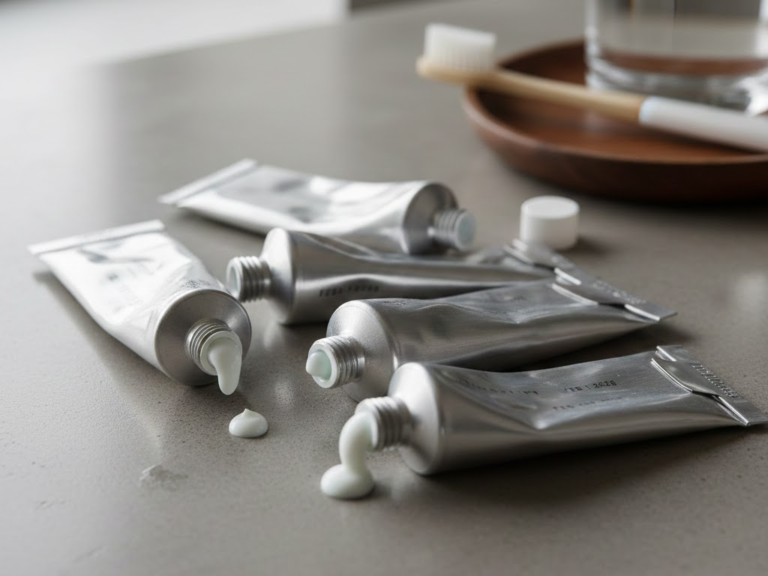
Crimping mechanically folds and presses the tube end without melting it. This creates a seal similar to toothpaste tubes. It’s quick and inexpensive but not always ideal for luxury cosmetic packaging due to its industrial appearance.
Step-by-Step Guide: How to Seal Plastic Cosmetic Tubes at Home
If you’re producing small batches, you can seal tubes at home with basic tools. Here’s a simple method:
Tools and Materials You’ll Need
- Heat sealer (impulse sealer or hair straightener for DIY)
- Heat-resistant gloves
- Flat workspace
- Filled cosmetic tubes
Step 1: Preparing the Tube and Product
- Ensure the product is fully inside the tube with no residue on the inside edges.
- Wipe the outside to remove oils or creams that could affect sealing.
Step 2: Positioning the Tube
- Hold the tube upright with the open end facing upward.
- Leave about 1 cm of empty space at the top for sealing.
Step 3: Applying the Seal
- If using a hair straightener: set it to medium-high heat.
- Clamp the open end for 2–3 seconds, applying gentle but firm pressure.
- For impulse sealers: press and release according to the machine’s instructions.
Step 4: Cooling and Testing the Seal
- Allow the tube to cool completely before handling.
- Gently squeeze to check for leaks.
- If the seal opens, repeat the process at a slightly higher temperature or with more pressure.
Industrial Tube Sealing Process
When producing at scale, sealing is automated using specialized machines that ensure speed, consistency, and precision.
Automated Tube Sealing Machines
These machines can:
- Fill the product.
- Seal the tube using hot air or ultrasonic methods.
- Trim excess plastic for a neat finish.
- Print batch codes or expiration dates.
Quality Control in Large-Scale Production
To maintain product integrity:
- Conduct seal strength tests.
- Inspect for misalignment.
- Perform leak tests before packaging.
Choosing the Right Tube Sealing Machine
Key Features to Look For
- Adjustable temperature control.
- Compatibility with different tube diameters and materials.
- Built-in trimming and coding functions.
Cost vs. Efficiency Considerations
While manual sealing equipment is cheaper upfront, automated machines save time and reduce labor costs in the long run, especially for high-volume production.
Common Tube Sealing Problems and Solutions
Weak or Incomplete Seals
- Cause: Low temperature or insufficient pressure.
- Solution: Increase heat settings or sealing time.
Overheating and Tube Damage
- Cause: Excessive heat application.
- Solution: Lower temperature or reduce sealing time.
Misalignment Issues
- Cause: Tube not centered in the sealing clamp.
- Solution: Use guides or alignment fixtures.
Safety Tips for Sealing Plastic Cosmetic Tubes
Heat Safety Precautions
- Wear heat-resistant gloves.
- Keep hair and clothing away from heating elements.
Proper Ventilation During Sealing
- Some plastics release fumes when heated—work in a well-ventilated area or use fume extraction equipment.
Eco-Friendly Considerations in Tube Sealing
Recyclable and Biodegradable Tubes
Opt for packaging made from post-consumer recycled (PCR) plastics or biodegradable polymers to reduce environmental impact.
Reducing Energy Consumption in Sealing
Choose energy-efficient sealing machines and optimize production runs to minimize energy waste.
Maintenance of Tube Sealing Equipment
Cleaning and Lubrication
Remove product residue regularly to prevent buildup that can affect sealing quality.
Regular Calibration and Servicing
Check temperature accuracy and replace worn sealing elements as needed.
Cost Analysis of Tube Sealing Options
Manual Sealing vs. Automated Sealing
- Manual: Lower upfront cost, slower speed, higher labor needs.
- Automated: Higher upfront investment, faster, consistent, and cost-effective over time.
Long-Term Investment Perspective
A high-quality sealing machine can pay for itself within months for medium to large-scale production.
FAQs About How to Seal Plastic Cosmetic Tubes
1. Can I seal plastic cosmetic tubes with a hair straightener?
Yes, for small batches, a hair straightener set to medium-high heat works as a DIY solution.
2. What temperature should I use for heat sealing?
Typically between 150°C–200°C, but always check your tube material’s specifications.
3. How do I know if my seal is strong enough?
Perform a squeeze test—if no product escapes, the seal is likely sufficient.
4. Which sealing method is best for eco-friendly tubes?
Ultrasonic sealing is energy-efficient and works well with recyclable plastics.
5. Can I reseal a cosmetic tube once it’s opened?
Not easily—most consumer tubes are designed for single-use sealing.
6. What’s the most common sealing problem for beginners?
Uneven heating, which can lead to weak seals or melted spots.
Conclusion and Final Recommendations
Mastering how to seal plastic cosmetic tubes is a vital skill for cosmetic makers, whether you’re working from a home studio or running a large-scale production facility. By understanding your tube material, choosing the right sealing method, and following proper safety and maintenance practices, you can achieve a professional, leak-proof seal every time.
For high-volume work, investing in an automated sealing machine pays off in consistency and efficiency. For small batches, a simple heat sealer or hair straightener can do the trick with the right technique.
Ready to customize your packaging? Contact our team for detailed pricing, MOQ flexibility, and fast production samples.


